SAML support can be enabled for Paperspace Teams to allow users to use the same credentials across many websites including Paperspace.
Team Admin can set up SAML for their team using the majority of identity providers (IdPs) as long as they are compatible with the latest implementation of the SAML 2.0 specs. To get started, you set up an application with your chosen IdP, such as Google or Auth0, and administrator access to your Paperspace Team.
If you would like SAML enabled on your account, please contact your deployment specialist or fill out this form to connect with a member of the sales team.
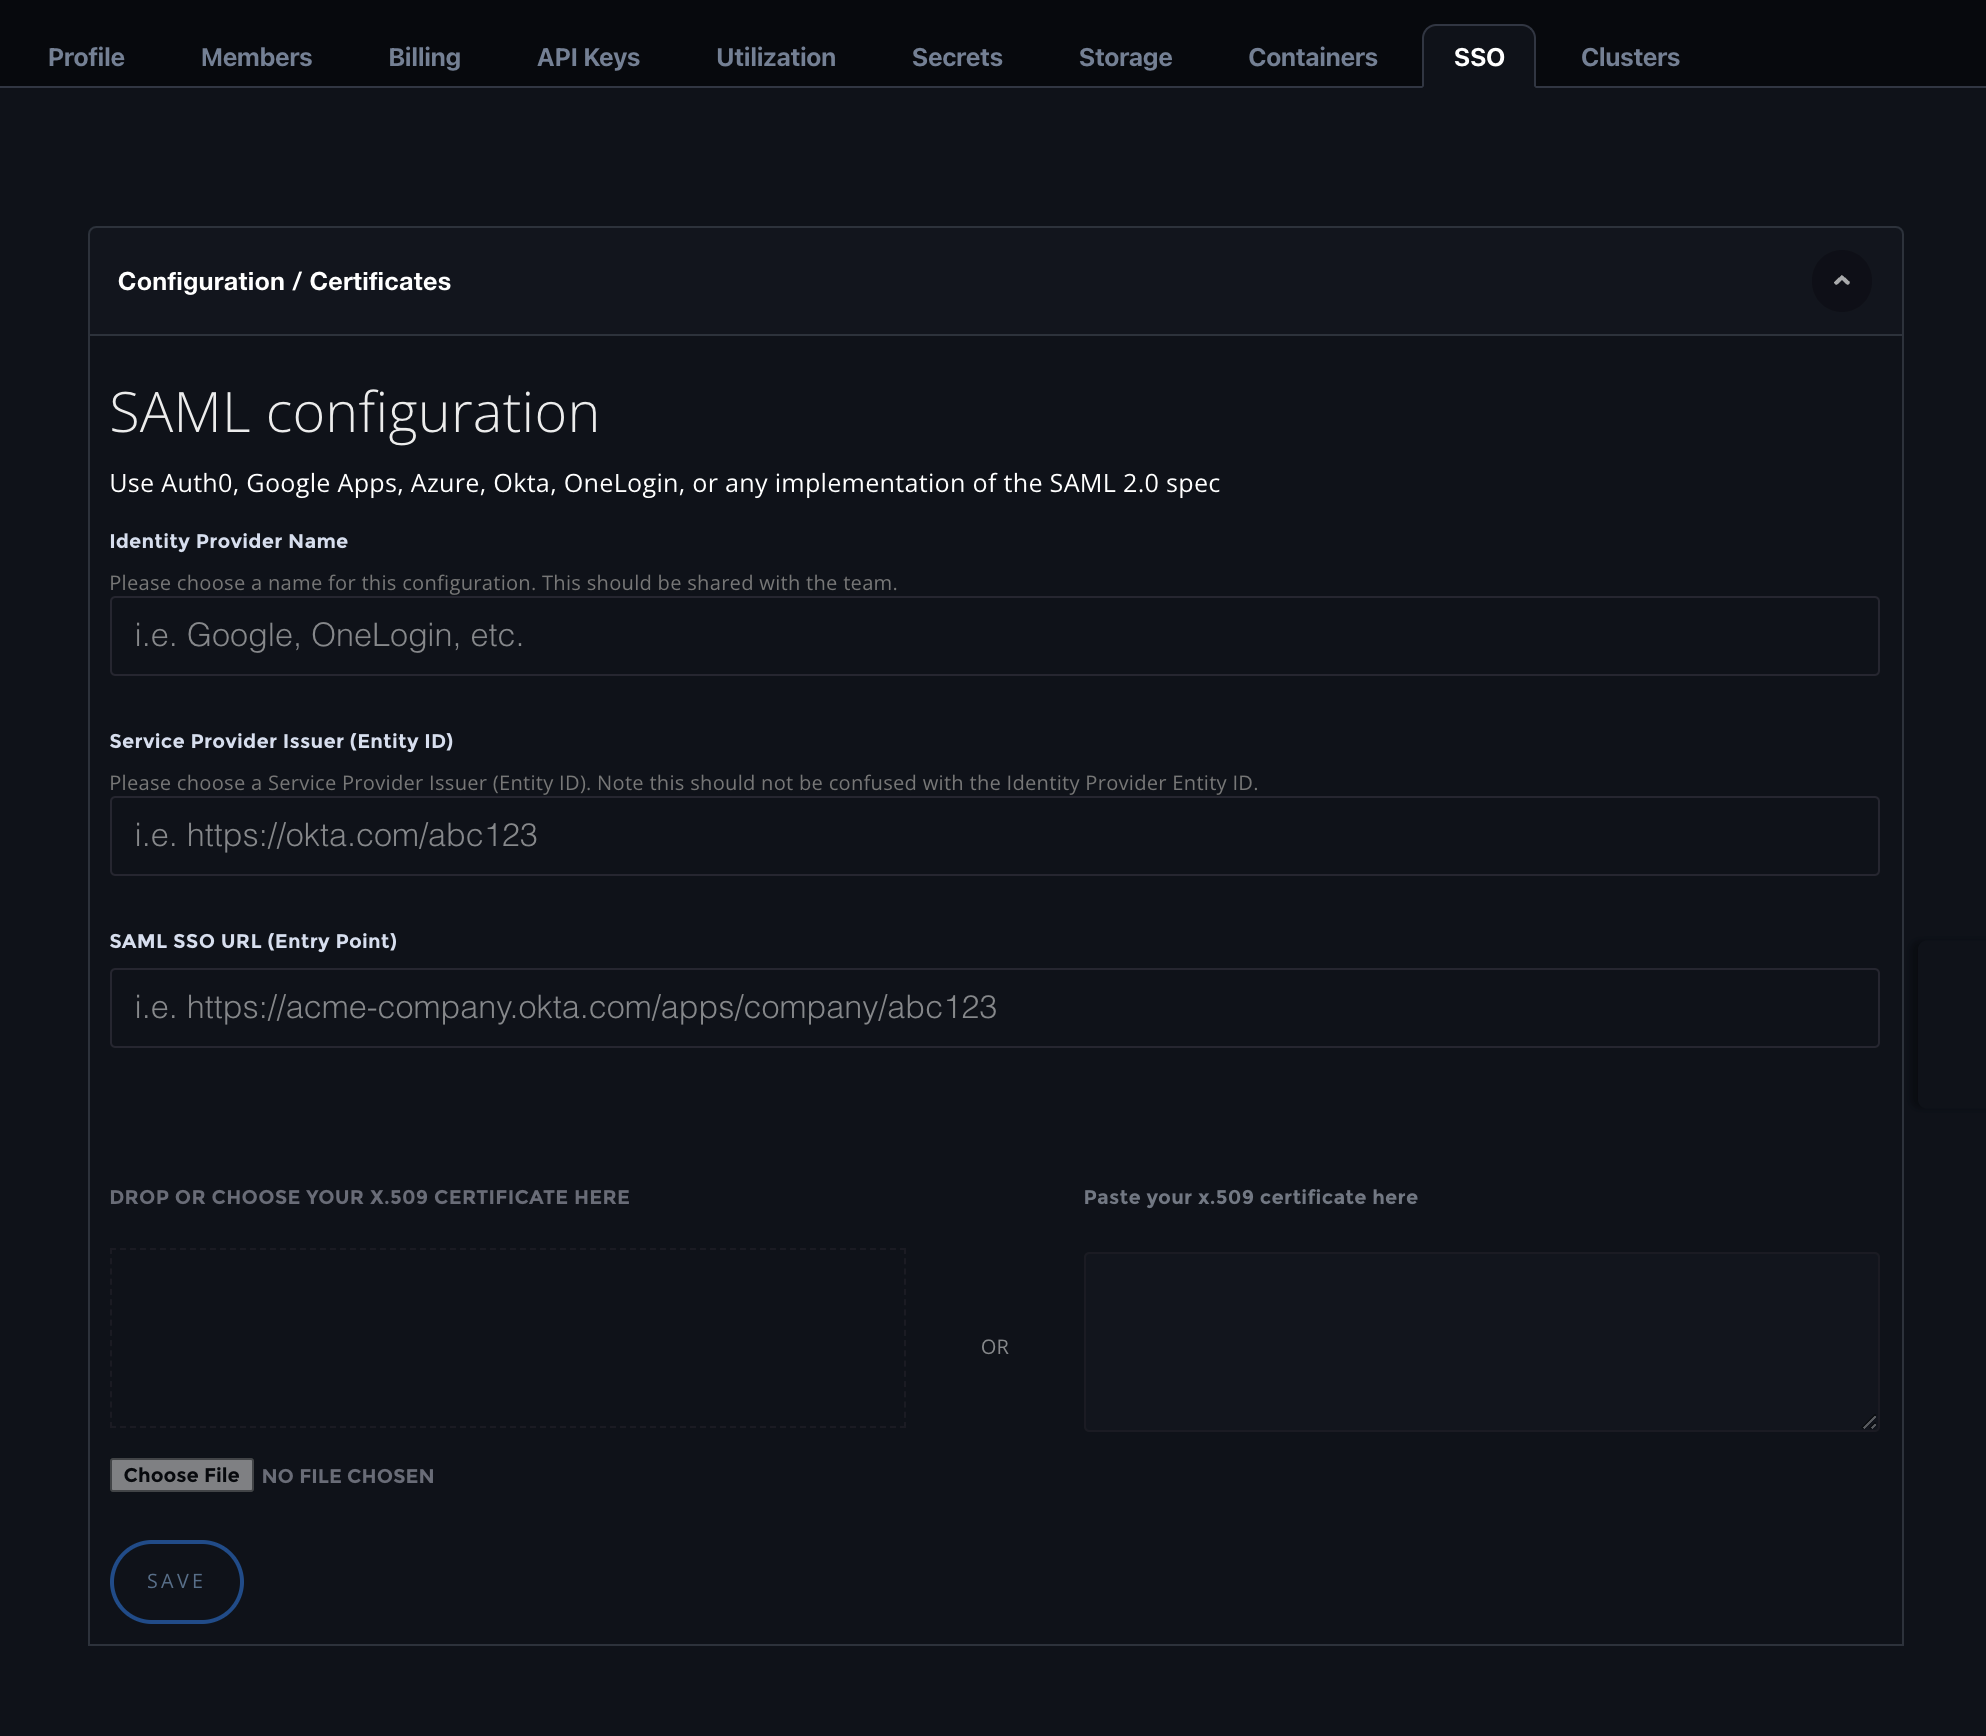
In your Paperspace Console, Select “Manage All Teams” from the bottom-left menu, and select the team on which you’d like to enable. Choose “Single Sign-On” from the Team’s menu where there is a setup form that requires collecting information from your IdP to recognize Paperspace as a Service Provider.
Identity Provider Name is a name that you can choose for this configuration. It should be something unique but shareable with your team. Identity Provider Issuer (Entity ID) is a name that is supplied to the identity provider. It might be used by the Identity Provider to verify that it is a trusted partner. Note this should not be confused with the Identity Provider Entity ID. SAML SSO URL (Entry Point) is a unique URL for each application. X.509 Certificate provided by your IdP can be uploaded or pasted into the text box.
When you’ve completed these fields, click the Save button. The Service Provider Details are then generated in the section below the form. If you don’t yet have the SAML SSO URL (Entry Point), or your Identity Provider (IdP) requires you the Assertion Consumer Service (ACS) URL up front (for example this is true for the Okta setup), you can fill in anything for the SAML SSO URL (Entry Point) and wait with submitting a certificate. You can always add these details later.
The Login URL and the Identity Provider Name should be shared with your team. This is necessary for them to login to Paperspace directly using SAML.

You are provided with Metadata. This is used to configure your Identity Provider. The Assertion Consumer Service (ACS) URL, and the Name ID Format are the important parts. Though, Entity ID and Document ID might also be requested. Note at this point we don’t support any other formats.
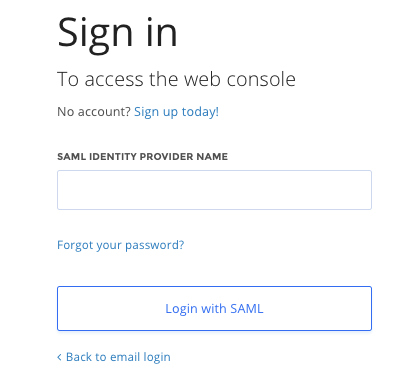
Once your setup is complete and your users are configured in your Identity Provider your users can log in to Paperspace with their credentials using either the Login URL you provide to them, or by selecting Login with SAML on any Paperspace login page, where they are prompted to enter their Identity Provider Name and taken to the login page to authenticate.
This Login URL can also be added to your Identity Provider if you prefer an Identity Provider initiated login flow. Please see the docs of your Identity Provider for instructions on how to add this.
Assertion: data provided by the IdP that supplies one or more of the following statements to a service provider:
Okta SAML template, this is entered in the Single Sign On URL field.Attribute: a set of data about a user, such as username, first name, employee ID, etc
Audience Restriction: a value within the SAML assertion that specifies who (and only who) the assertion is intended for. The “audience” is the service provider and is typically a URL but can technically be formatted as any string of data. If this value is not provided by the SP, try using the ACS
Default Relay State: the URL that users are directed to after a successful authentication through SAML.
Endpoint: the URL’s that are used when Service Providers and Identity Providers communicate to one another.
Entity ID: a globally unique name for an Identity Provider or a Service Provider. A unique Okta Entity ID is generated for each application, and is referred to as the Identity Provider Issuer in the Okta application’s Setup Instructions.
Identity Provider (IdP): the authority that verifies and asserts a user’s identity and access to a requested resource (the “Service Provider”)
Metadata: a set of information supplied by the IdP to the SP, and/or vice versa, in xml format.
Okta.NameID: an attribute within the assertion that is used to specify the username
Service Provider (SP): the hosted resource or service that the user intends to access, such as Box, Workday, Salesforce, a custom application, etc.
Single Sign On URL: the endpoint that is dedicated to handling SAML transactions. In the Okta SAML template setup screen, the SSO URL refers to the service provider’s ACS.