Workflows automate machine learning tasks, combining GPU instances with an expressive syntax to generate production-ready machine learning pipelines with a few lines of code.
The Gradient model repository is a hub for importing, managing, and deploying ML models.
Gradient Models can be created in two ways:
Gradient has a repository of Models per project. The model repository holds reference to the model artifacts (files generated during training) as well as optional summary metrics associated with the model’s performance such as accuracy and loss.
Paperspace supports the following model formats:
There are two ways to create a Model in Gradient, and both can be done via the web UI or CLI:
You can do this via using a Gradient Action or the SDK. This places your Model in your Project’s Model repository. For more information, see the Model CLI/SDK docs.
You can upload models in the model repository via the Web UI or CLI.
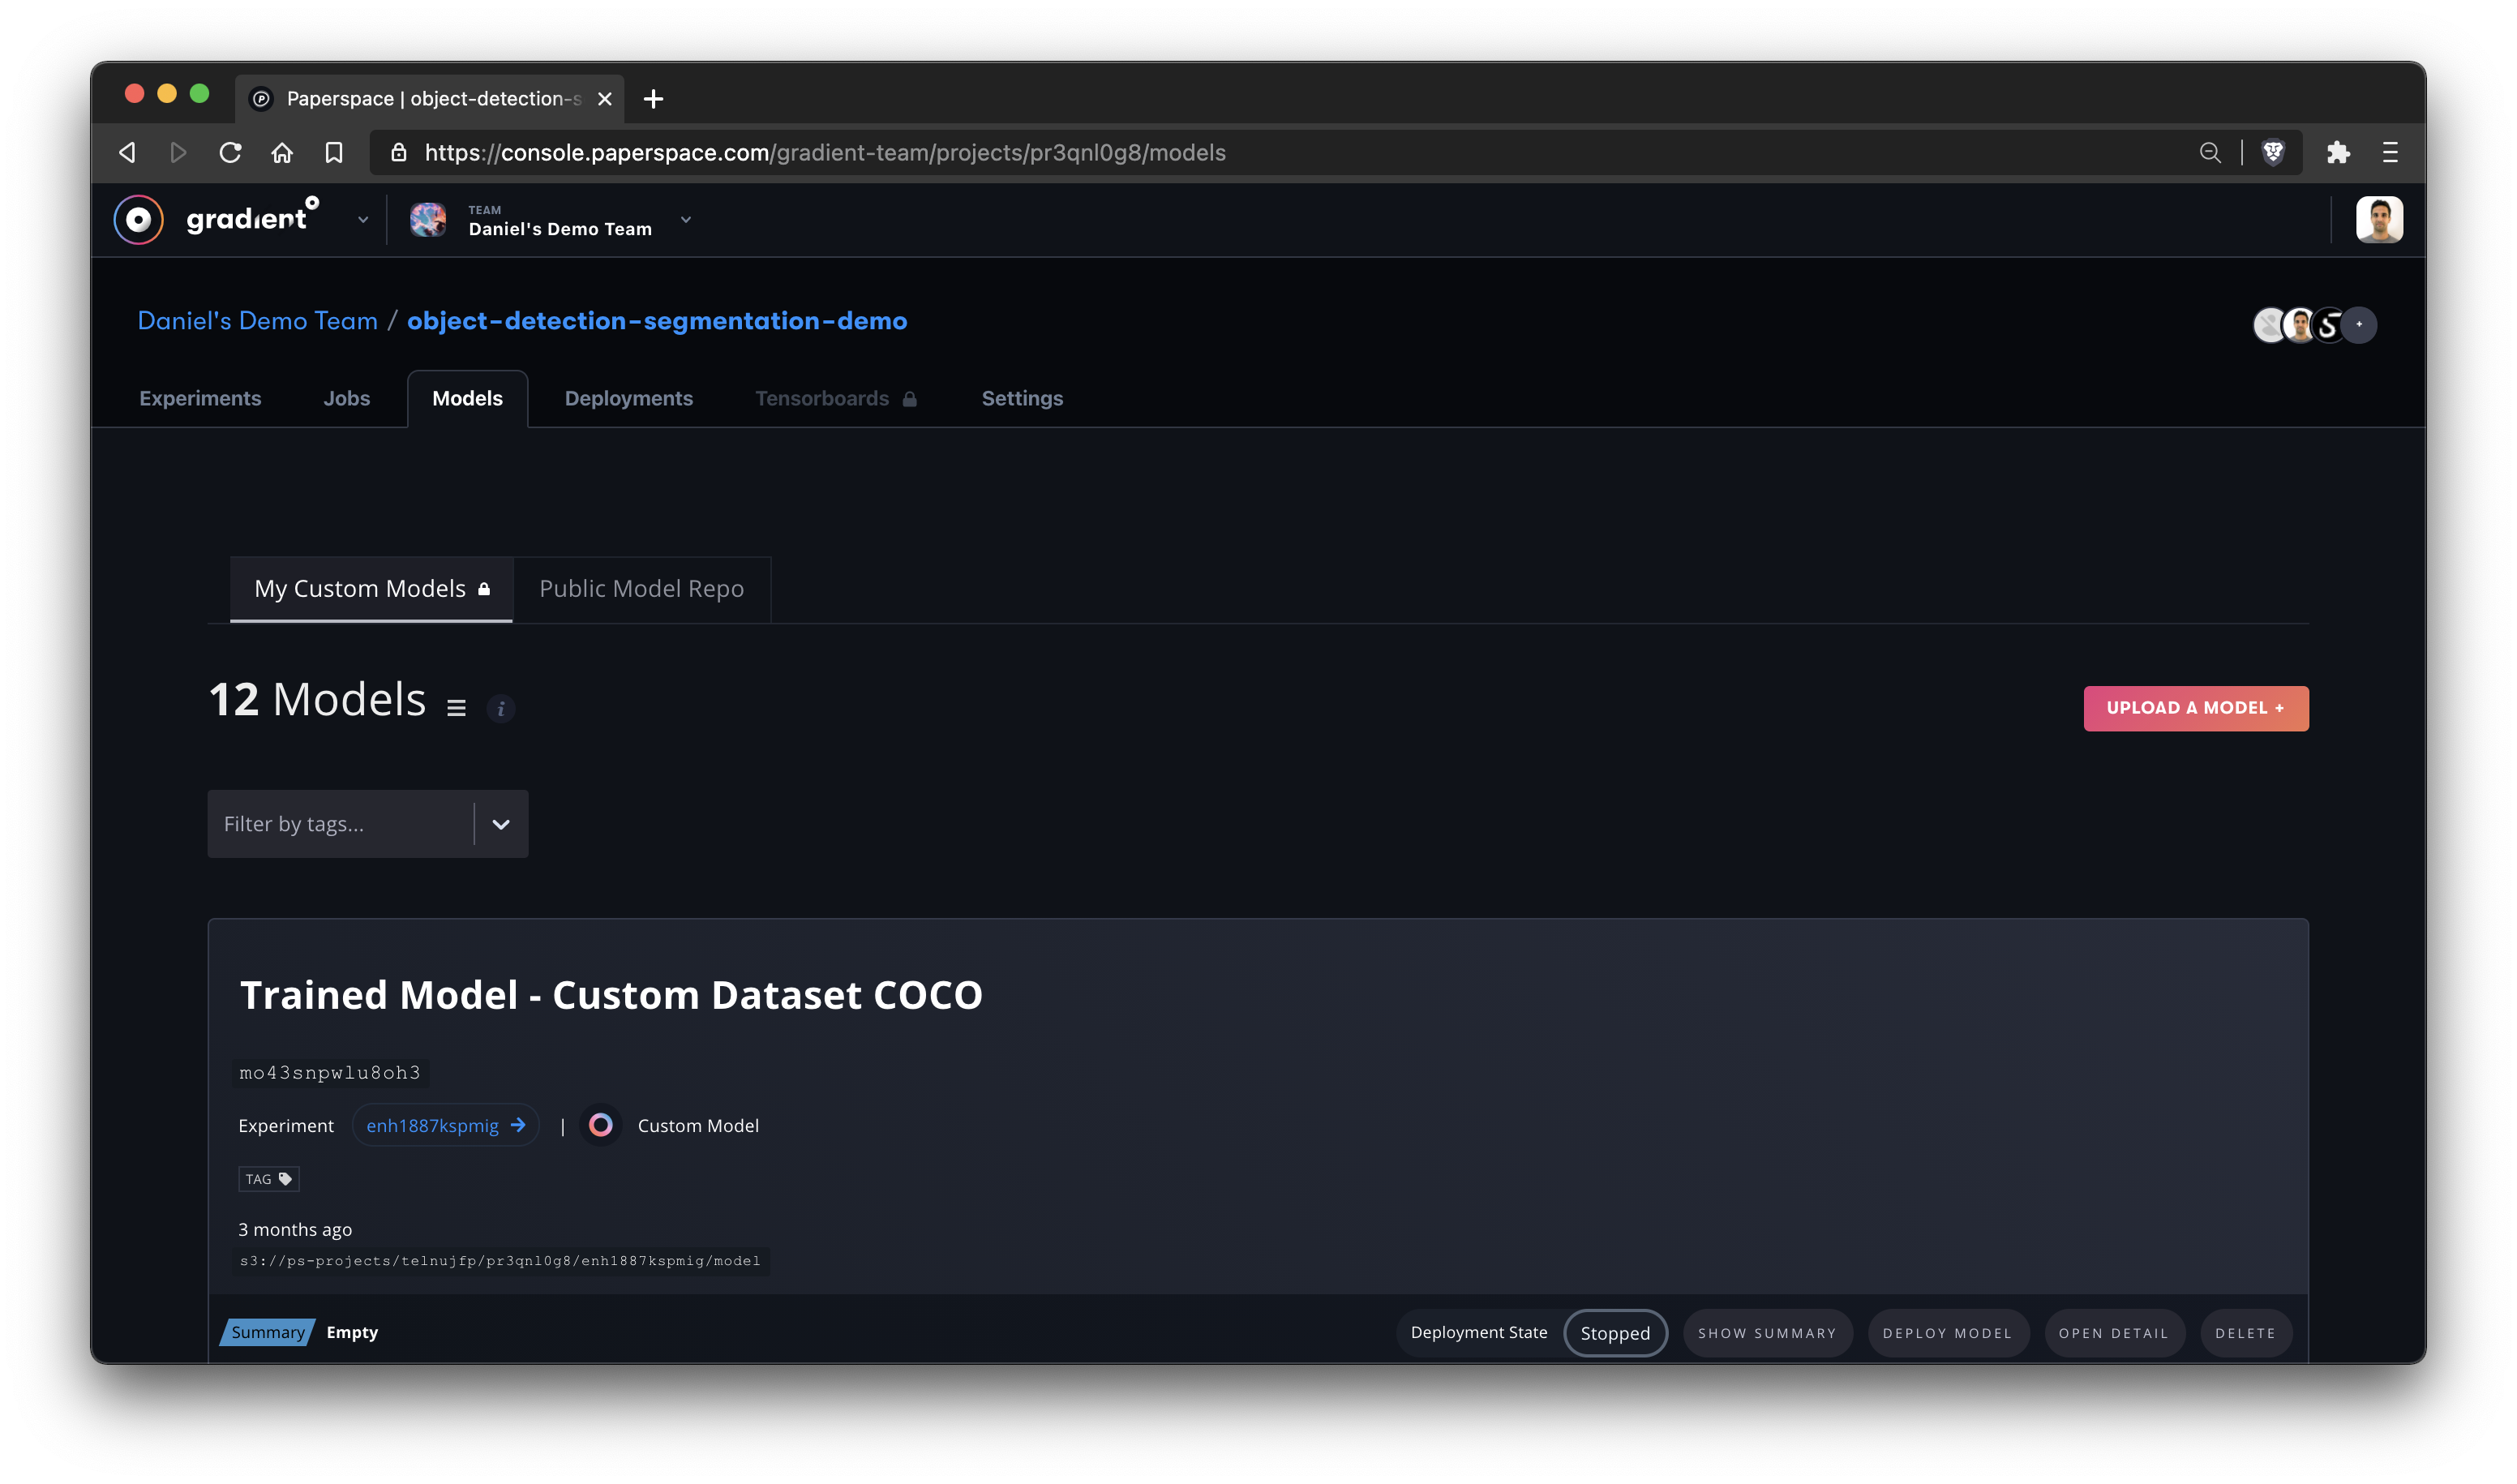
To upload a Model via the Web UI, first navigate to the Models page.
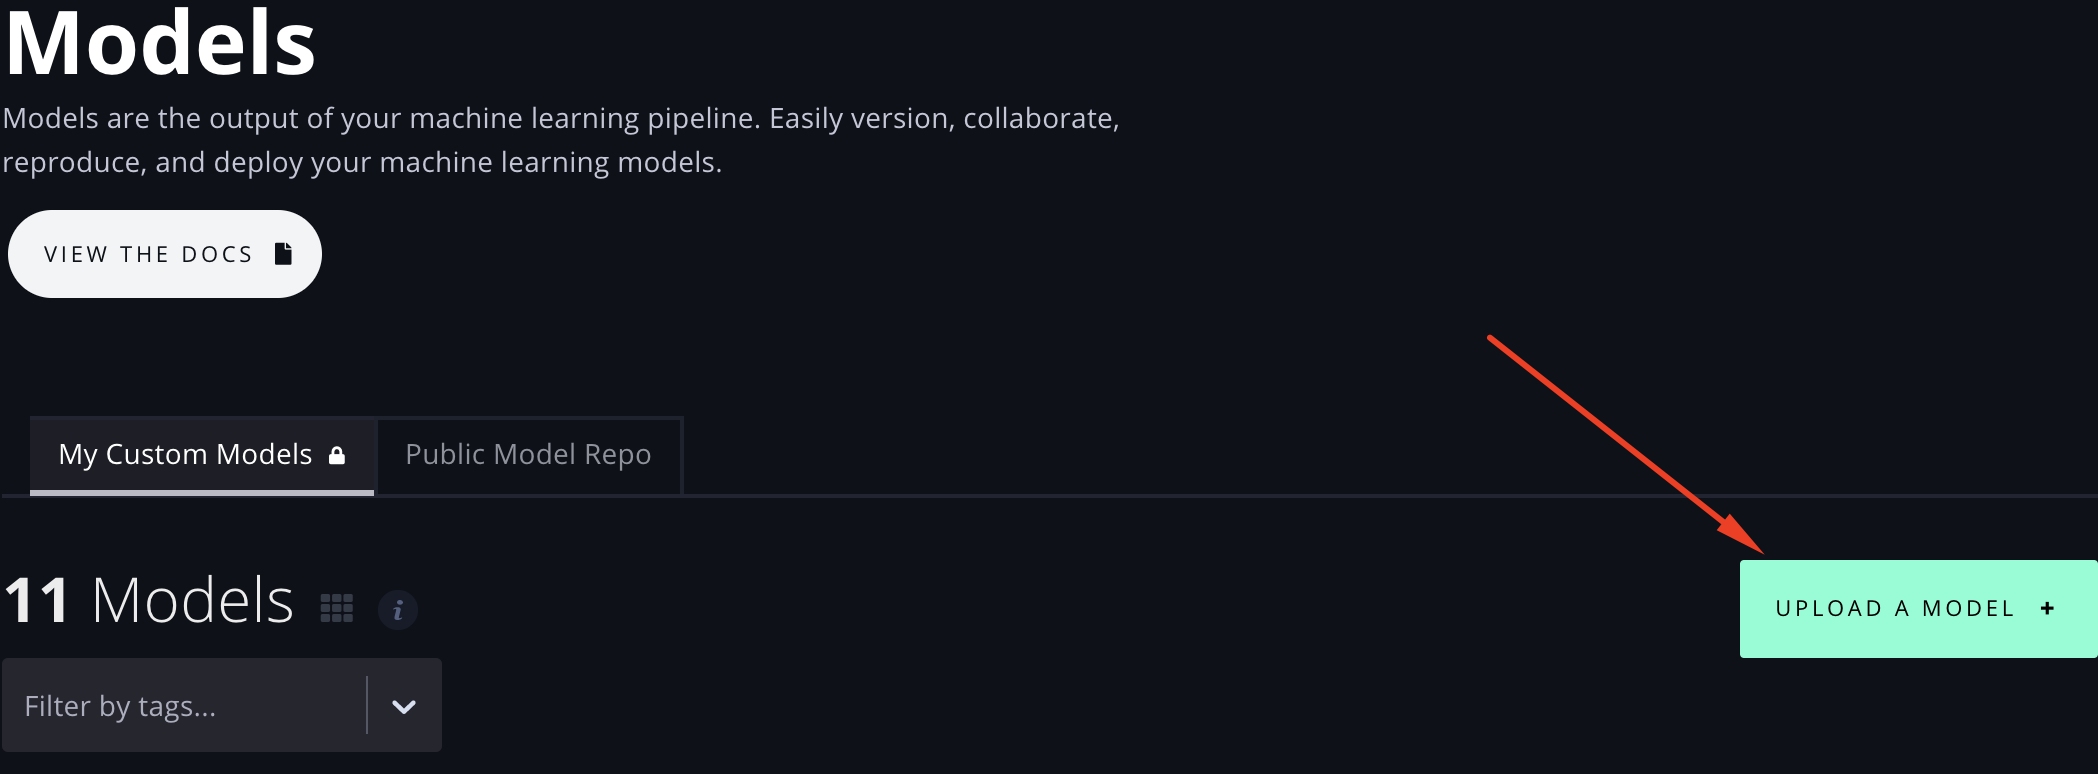
From there, click Upload a Model +
This opens up a modal to Upload a Model, where you can drag ’n’ drop a Model file from your local machine (or click to find it locally), as well as select the model Type and provide a Name, custom Summary, and any Additional Notes as metadata. Additionally, you can click “Or Upload a directory” to select a local folder.
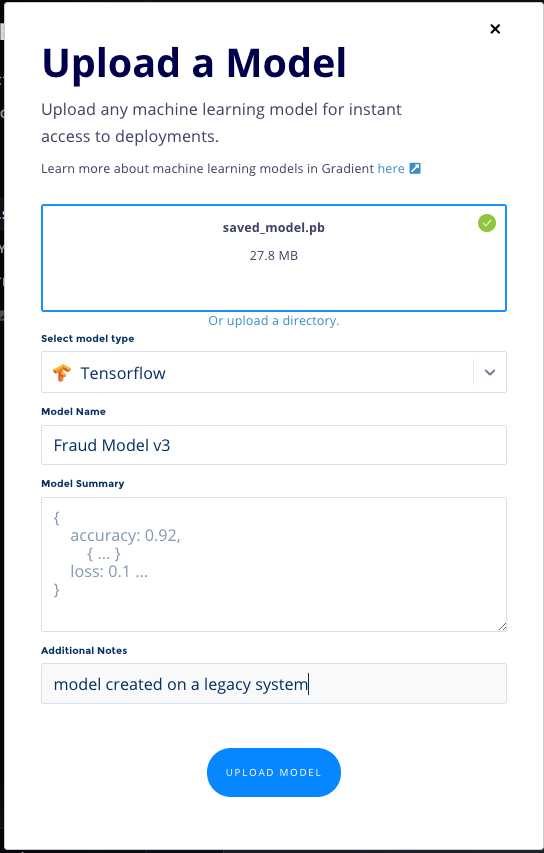
Then click Upload Model. This uploads and registers the Model in Gradient.
You can upload a Model via the CLI with the gradient models upload subcommand:
gradient models upload downloads/squeezenet1.1.onnx --name squeezenet --modelType ONNX
Whether you use the Web UI or CLI, you’ve now successfully uploaded a Model into Gradient!
Now that you have a Model, whether uploaded or generated by running an Experiment, read on to learn how you can use it to create a Deployment.
You can view your team’s models in the model repository via the Web UI or CLI.
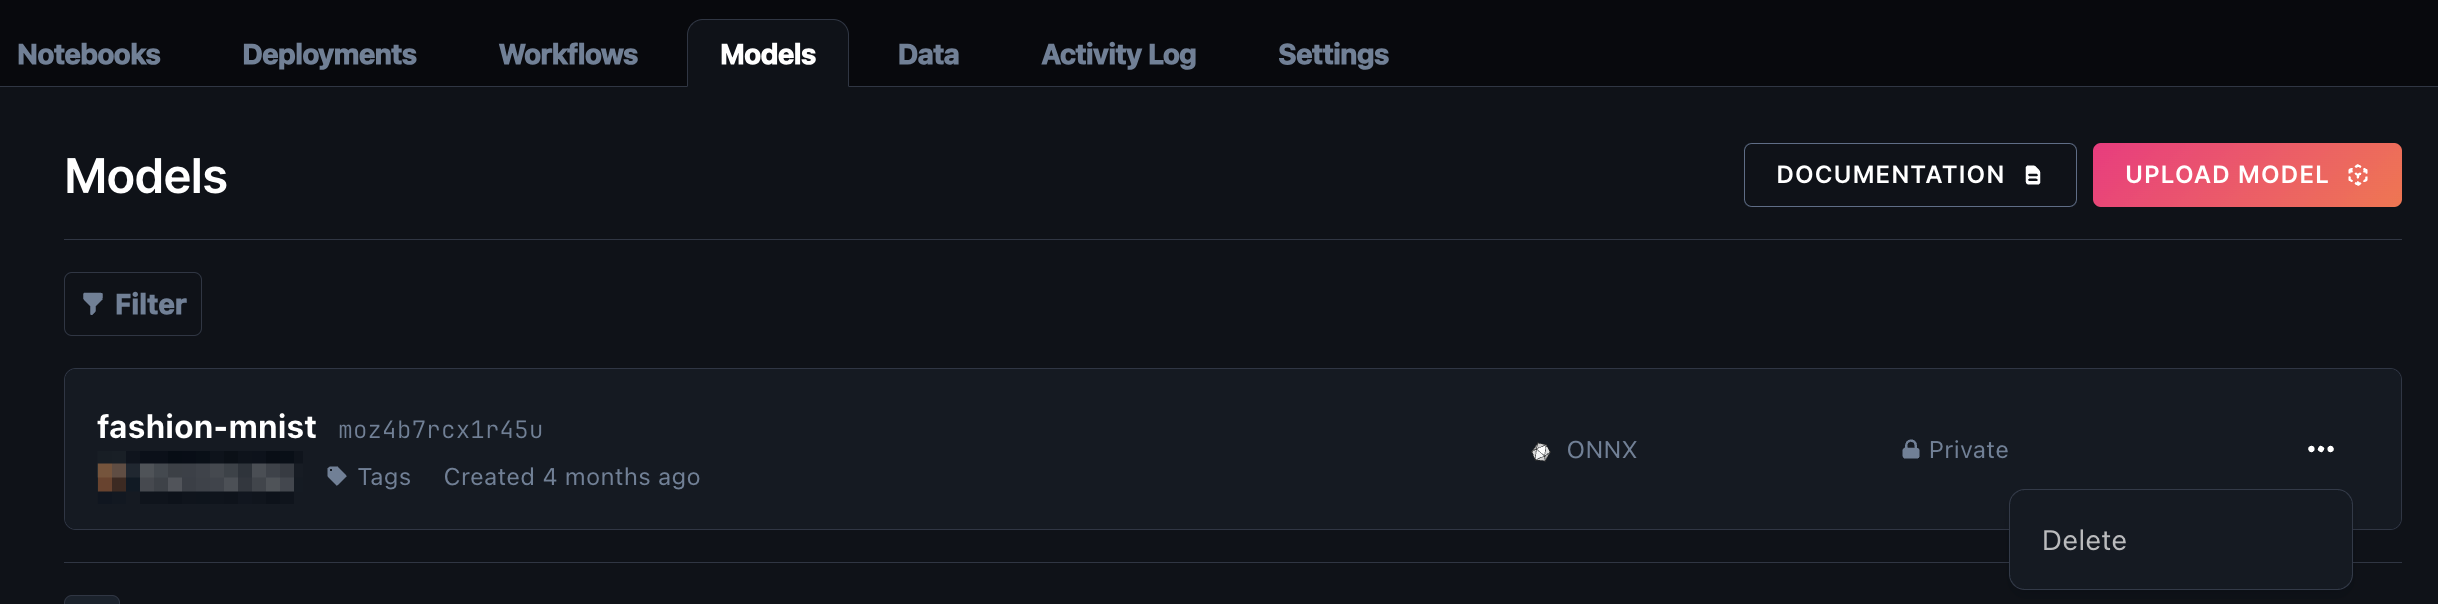
Navigate to Models in the side nav to see your list of trained Models:

The Web UI view shows your Model ID, when the model was created, the S3 bucket location of your model, your metrics summary data, the Experiment ID, the model type, and whether it is currently deployed on Paperspace.
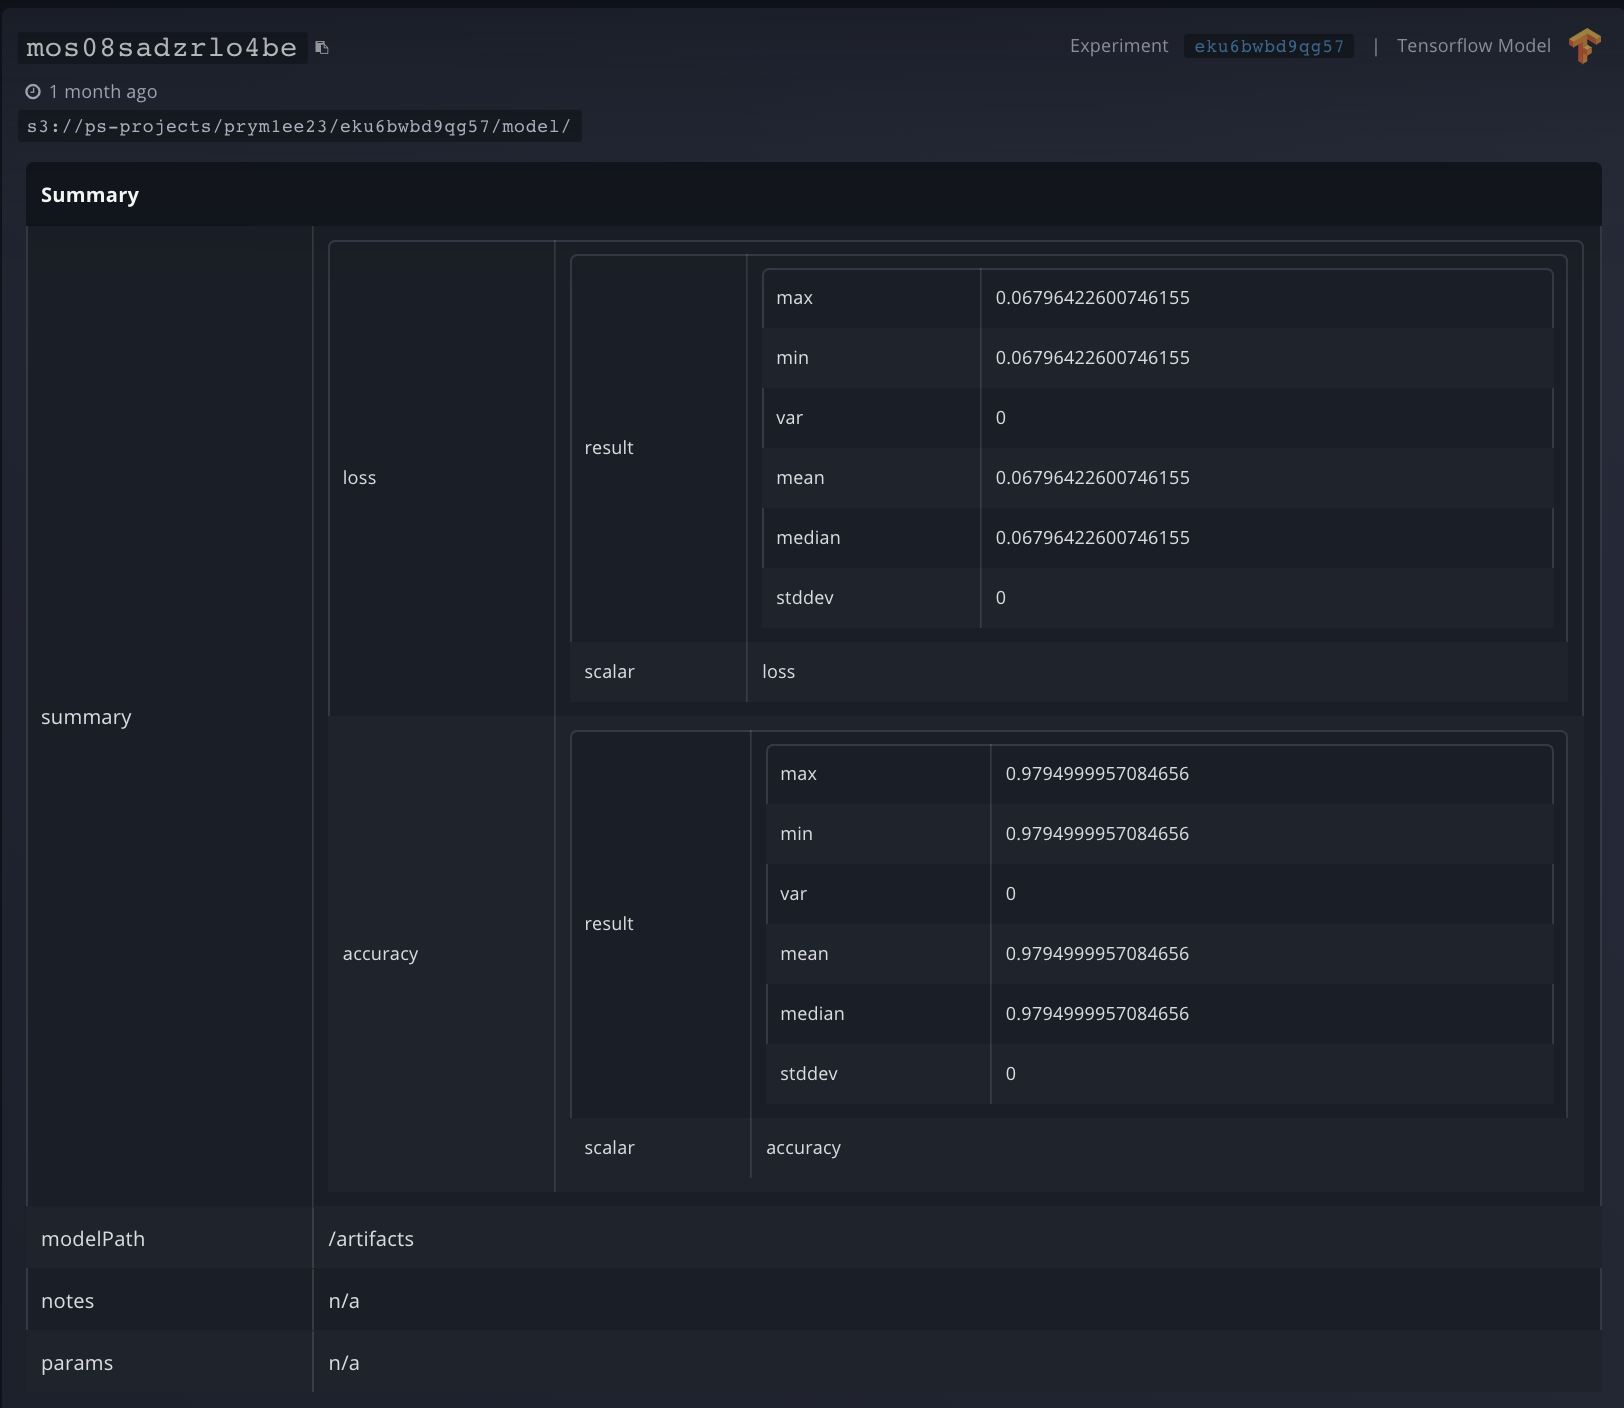
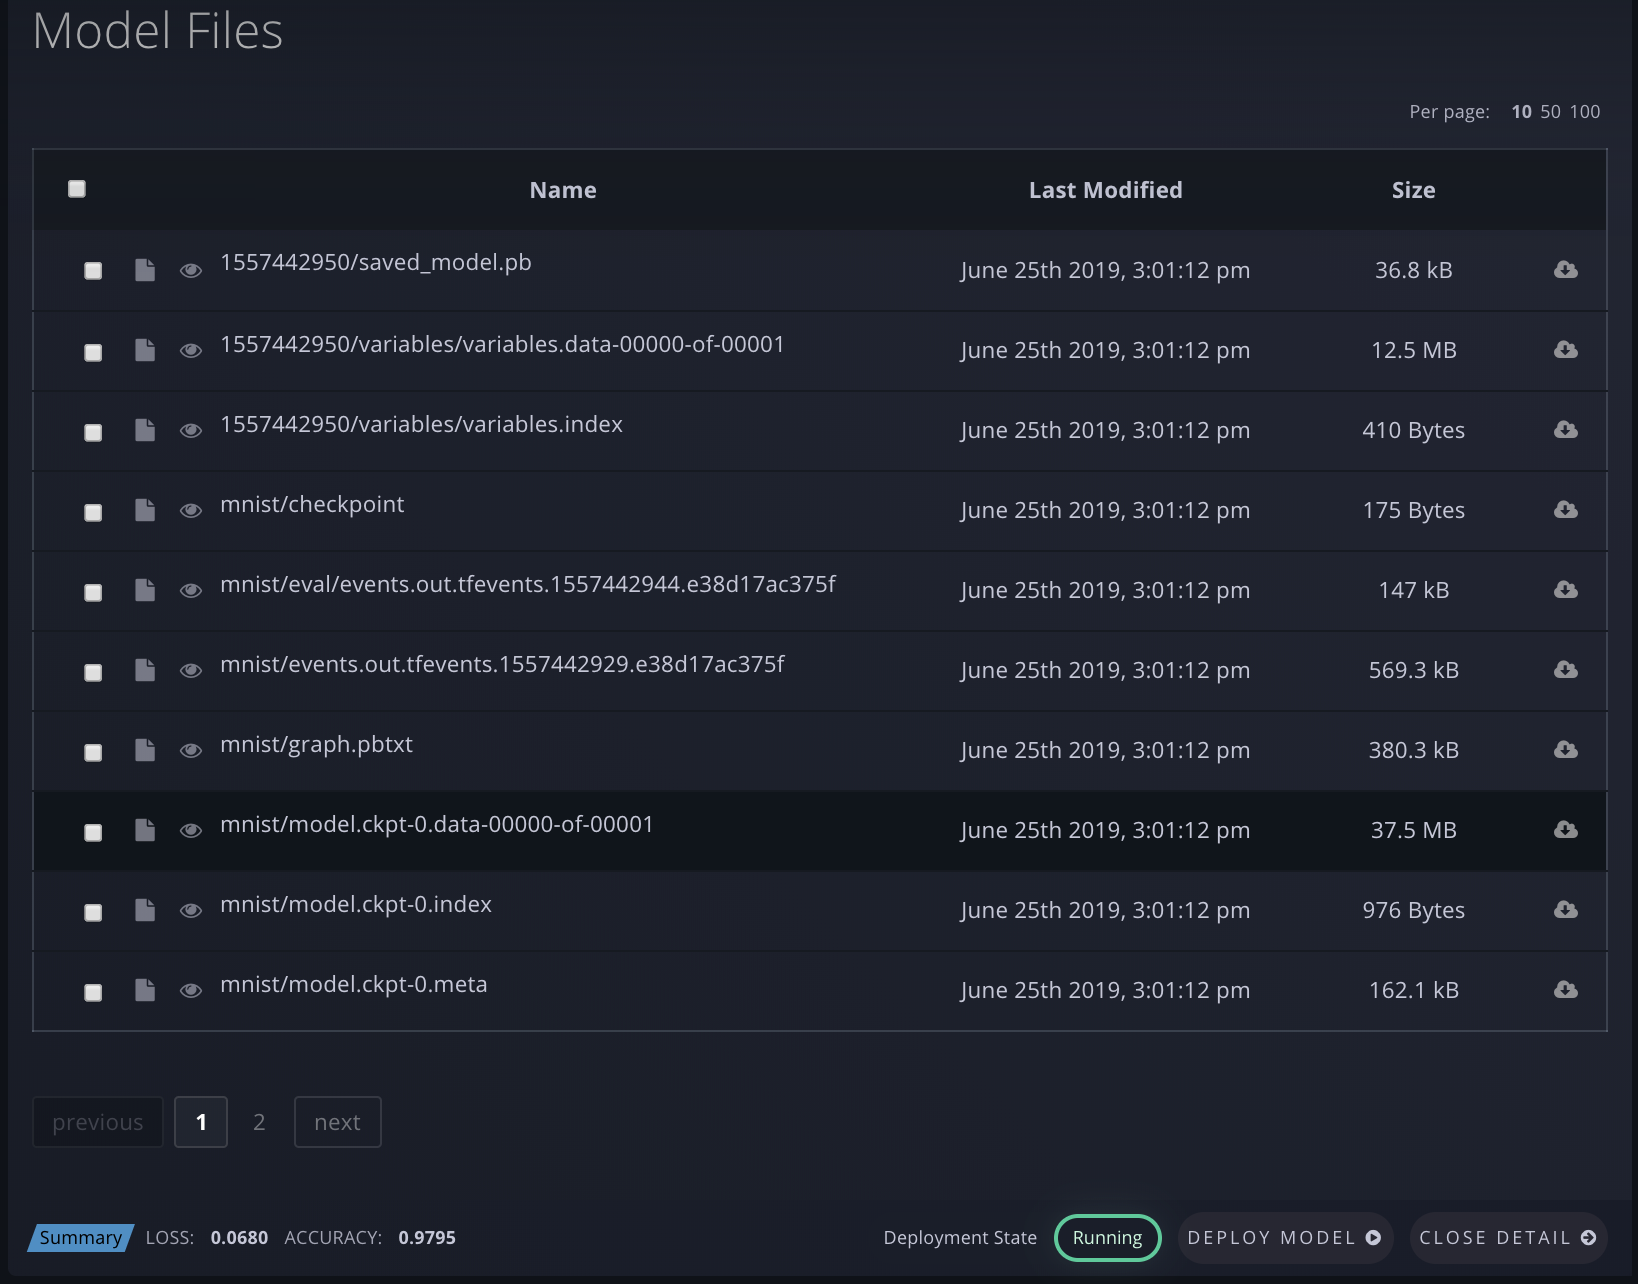
You can click Deploy Model to create a deployment with your Model. And you can click Open Detail to see a more detailed view of the Model’s performance metrics. This also shows a list of all of the checkpoint files (artifacts) generated by the Experiment, as well as the final Model at hand, and you can download any of those files.
Alternately, you can view your Models (currently with less detailed info) via the CLI by running gradient models list.
$ gradient models list

+------+-----------------+------------+------------+----------------+
| Name | ID              | Model Type | Project ID | Experiment ID  |
+------+-----------------+------------+------------+----------------+
| None | moilact08jpaok  | Tensorflow | prcl68pnk  | eshq20m4egwl8i |
| None | mos2uhkg4yvga0p | Tensorflow | prcl68pnk  | ejuxcxp2zbv0a  |
| None | moc7i8v6bsrhzk  | Custom     | prddziv0z  | e5rxj0aqtgt2   |
You can use the following parameters with the list subcommand:
| Argument | Description |
|---|---|
--experimentId |
Filter models list by Experiment ID |
--projectId |
Filter models list by Project ID |
Click on the name to rename your model.

You can delete a model from the model repository using the Paperspace console or the CLI.
To delete a model, follow these instructions:
You can delete a model using the CLI with the following command:
gradient models delete --id <your-model-id>
To store Models in the Models list, add Model-specific parameters to the Experiment command when running an Experiment.
--modelType defines the type of model that is being generated by the experiment. For example, --modelType Tensorflow ensures that the model checkpoint files being generated are recognized as TensorFlow model files.
| Model Type Values | Description |
|---|---|
"Tensorflow" |
TensorFlow compatible model outputs |
"ONNX" |
ONNX model outputs |
"Custom" |
Custom model type (for example, a Flask server) |
When modelType is not specified, custom model metadata can be associated with the model for later reference by creating a gradient-model-metadata.json file in the modelPath directory. Any valid JSON data can be stored in this file.
For models of type Tensorflow, metadata is automatically generated for your experiment, so any custom model metadata is ignored.
An example of custom model metadata JSON is as follows:
{
  "metrics": [
    {
      "name": "accuracy-score",
      "numberValue": 60
    }
  ]
}