How to Deploy from Container Images
App Platform is a Platform-as-a-Service (PaaS) offering that allows developers to publish code directly to DigitalOcean servers without worrying about the underlying infrastructure.
You can deploy containerized apps to App Platform from supported container registries. App Platform currently supports deploying public and private images from DigitalOcean Container Registry, Docker Hub, and GitHub Container Registry.
Deploy Resource using a Container Image as the Source
To deploy an app from a container registry from the DigitalOcean Control Panel, click the Create button and then select the Apps option.
Create Resource From Source Code
On the Create Resource From Source Code screen, select your container registry service, either DigitalOcean Container Registry, Docker Hub, or GitHub Container Registry. Selecting any of these options opens additional fields on the screen.
In the Repository field, select the repository that hosts your app’s image. After selecting a repository, you can optionally choose to deploy an image with a specific tag or digest hash by entering it into the Image tag or digest field. If you do not enter a tag, the field defaults to the latest tag.
If you choose the Docker Hub or GitHub Registry option, you can enter your credentials to access private images. If your image is public, you do not need to enter your credentials. Credentials are entered using the following syntax: username:token or username:password.
If you are using DigitalOcean Container Registry, select the Autodeploy option to have App Platform automatically redeploy your app each time a new image with the specified tag is pushed to your repository.
Once you have entered your repo’s information, click Next.
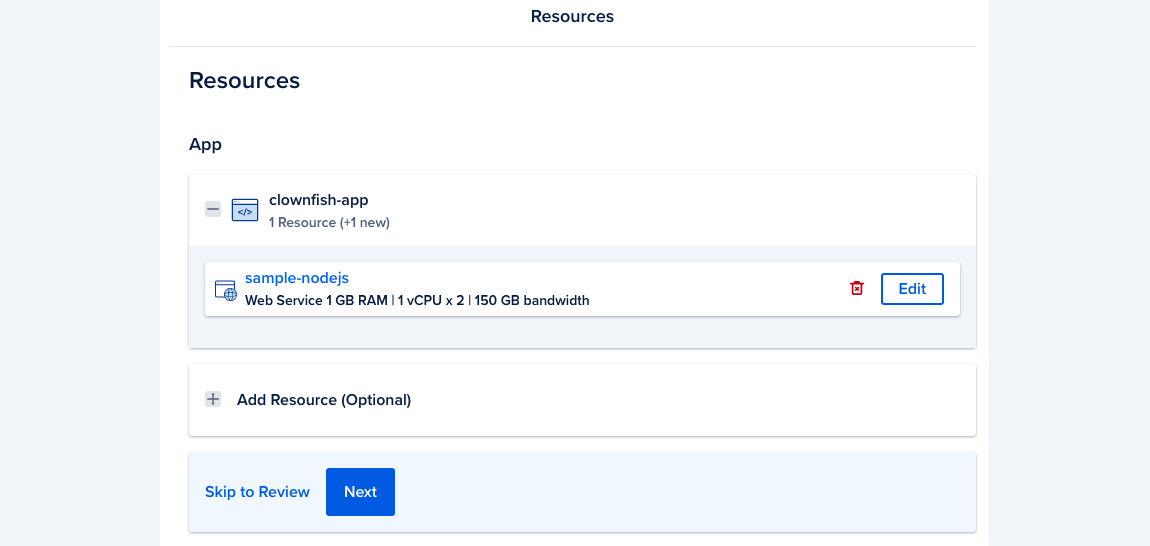
Resources
Resources are deployable runtime apps and databases. Each app resource contains a list of its components, which can be web services, workers, jobs, or static sites. Web services, workers, and jobs are built from source code repositories or container images and are hosted in containers. Static sites are built from a directory of static files and hosted on DigitalOcean’s CDN.
Configure Component Settings
Each component in an app has its own settings that determine its deployment configuration, including its instance size, build and run commands, and available HTTP ports. To configure the settings for a component, click Edit beside the component you want to change on the Resources screen.
App Platform displays the settings for the component, several of which may be auto-filled by App Platform’s detection system. You can configure the following settings for your app:
-
Name: A unique name for the component.
-
Resource Type: - The type of app to be deployed, either a web service, static site, or worker service. This field determines which additional configuration options are available for your app on this screen.
-
Resource Size - The amount of memory (RAM), number of CPUs, and bandwidth allocated to the component. You can select a size that uses either shared or dedicated CPUs. Shared CPUs share their processing power with other DigitalOcean users. Dedicated CPUs are dedicated solely to your app. We recommend dedicated CPUs for more resource-intensive applications that require consistent high performance and autoscaling.
You can also configure your app’s scaling settings in this section. Depending on what instance size you select determines the scaling options available to the component. For more information about scaling, see How to Scale Apps in App Platform.
-
Build Phase - Add a custom build command to run before the app is deployed. This is useful for compiling assets, installing dependencies, or running tests before deployment.
-
Run Command - For web and worker services only. You can specify custom run commands for the application to run after deployment. If no run commands are specified, the default run command for your app’s language is used, such as
npm startfor a Node.js app. For Dockerfile-based builds, entering a run command overrides the Dockerfile’s entrypoint. -
HTTP Port - For web services only. The port that the app receives HTTP requests on. The default port is
8080. -
HTTP Request Routes - For web services and static sites only. The URL path where the app can be accessed, such as
your-app-v3cl4.ondigitalocean.app/api. If not specified, the app is accessible from the provided hostname’s root. -
Output Directory - For static sites only. An optional path to where the build assets are located, relative to the build context. If not set, App Platform automatically scans for these directory names:
_static,dist,public,build.
App Platform uses cloud-native buildpacks to build your app and uses the buildpack’s default build and run commands. Refer to the cloud-native buildpack reference for more information about specific buildpacks.
After you configure the resource settings, click Back to go back to the Resources screen.
Add Additional Resources (Optional)
Once you configure your app’s components, you can optionally add additional resources to the app, such as a database or another app resource.
To add another resource click Add Resource (Optional), then select one of the following options:
Detect from Source Code: This adds another app resource to your app and guides you through configuring its components similar to how you added your first app resource.
Database: This option guides you through how to add either a Developer Database or a previously existing DigitalOcean Managed Database to your app. Developer Databases are not meant for production workloads but are helpful for development and testing. For production use, we recommend using DigitalOcean Managed Databases.
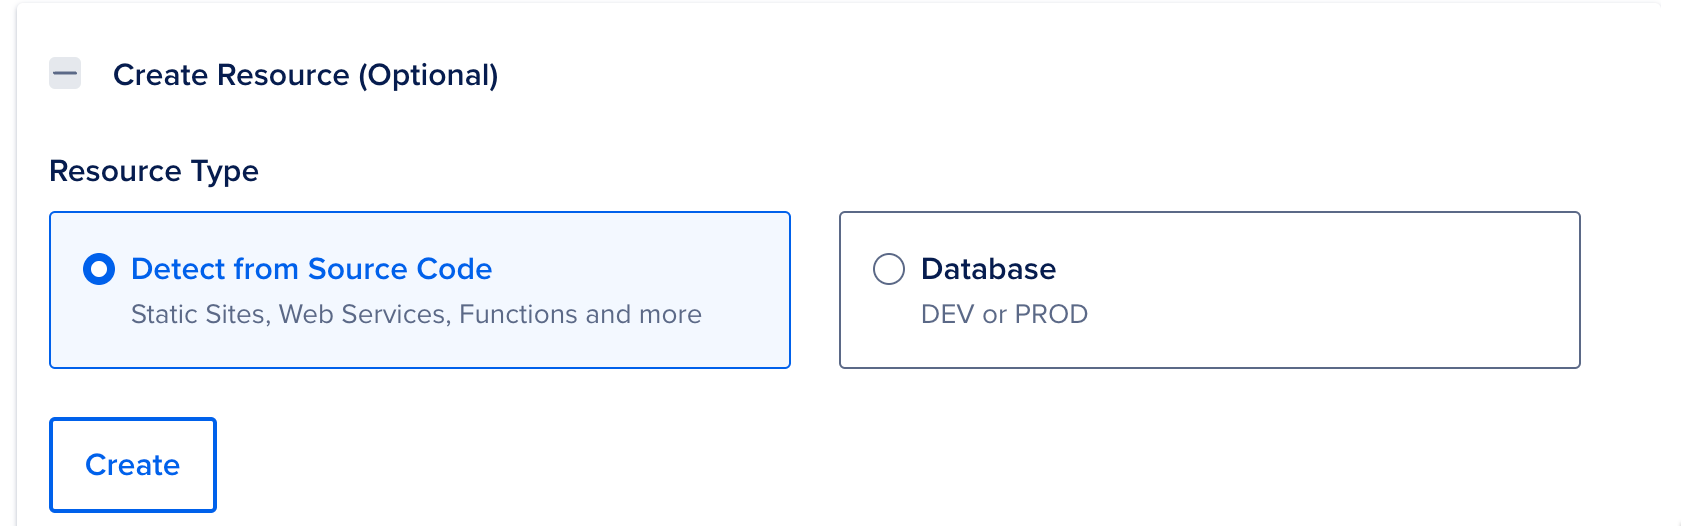
Select either option and then click Add. The control panel guides you through how to add the new resource to your app.
Once you configure the resources and their components, click Next.
Environment
If your app requires environment variables, such as the app’s URL or database connection strings, you can define them in this section. These can be runtime and build time environment variables. We also provide several app-specific dynamic environment variables that the app can reference. App-level variables can be accessed by all resources in your app.
On the Environment screen, click the corresponding Edit link to specify app-level or component-level environment variables. Click the Encrypt checkbox to obscure the variable’s values from all build, deployment, and application logs.
Once you configure the environment variables, click Next.
Info
On the Info screen, you can specify that app’s name, project, and the datacenter region to deploy it into.
Click Edit beside App Info to specify the name of your app and the project your app belongs to. The name can only contain lowercase alphanumeric characters and dashes.
Click Edit beside the Region field to specify app’s datacenter region. For performance purposes, it is best to select the region geographically closest to the app’s user base.
You cannot select a region for static sites. Static resources are served on DigitalOcean’s global CDN.
Once you enter a name for your app and select a region, click Next.
Review
On the Review screen, review your app’s configuration and billing information and then click Create Resources.
Once your app deploys, you can view the app at the URL at the top of the app’s Overview page.

Change the Tag of the Container Source After Deployment
You can change the tag and autodeploy settings of the container image to use as the source of an existing deployment.
To do this, navigate to the Apps page, click your app, and then click the Settings tab.
Select the resource that you created using a container from your registry. Under the Source heading, click the Edit link, then use the Tag drop-down to select the desired tag.
Use the Autodeploy checkbox to set your autodeploy preferences. Press Save to save the new settings and re-deploy your app.
Deploy Container using the App’s Spec
You can also deploy an image from a container registry using an app’s spec.
To do this, edit your app’s spec to include an image object. The image object can contain the following fields:
registry_type: A value specifying the container registry’s service. Valid values areDOCRfor DigitalOcean Container Registry,DOCKER_HUBfor Docker Hub, andGHCRfor GitHub Container Registry.registry: A string specifying the registry’s name. ForDOCKER_HUBandGHCR, this is the organization in which the image lives.repository: A string specifying the image repository’s name.registry_credentials: The credentials required to access a private Docker Hub or GitHub registry, in the following syntax"$username:$token". We recommend using a token that doesn’t expire and a scope limited to reading the app’s repository. Review GitHub and Docker Hub’s documentation to see how this is done.digest: A string specifying the image’s hash. This cannot be used with thetagfield.tag: A string specifying the image’s tag. Cannot be used with thedigestfield.deploy_on_push: An object containing a boolean indicating whether App Platform redeploys the app when it detects a push to the image’s repository. Can only be used with DigitalOcean Container Registry. The object looks like this:
deploy_on_push:
  enabled: true
The following example deploys an image from a private Docker Hub registry using an image digest:
name: front-end
services:
- name: web
  image:
    registry_type: DOCKER_HUB
    registry: example-registry
    repository: example-repo
    registry_credentials: "your_username:2YotnFZFEjr1zCsicMWpAA"
    digest: sha256:1234567890abcdef1234567890abcdef1234567890abcdef1234567890abcdef
The registry_credentials field requires you to initially submit your access credentials in clear text, but App Platform then encrypts and stores these values similar to secret environment variables. After submitting the spec, App Platform replaces the values in the spec with encrypted values. Once the values are encrypted, you can safely store the spec in the app’s repo.
Once you have edited the app’s spec to include an image object, either upload the spec using the control panel, apply it using doctl, or push the spec to your repo to trigger a deployment.